An adventure in three.js
Going back to Spring 2017, I wanted to venture into the world of graphics. I did not know anything about graphics, but I know I liked math and thought it would pique my interest. Additionally, I saw this on twitter and was extremely impressed (I recommend following them they create great content!). I thought a good project would be trying to recreate something similar. That is where my journey began.
Torus
The first thing I tried to do was just to create the torus. Now there is a built in torus in three.js, but I wanted to try making it myself. My initial thoughts were to first calculate all the vertices, and then connect them. The easiest way to do was to just use the parametric equation of a torus:
x = (R + rcos(θ)) * cos(φ)
y = (R + rcos(θ)) * sin(φ)
z = rsin(θ)
Explaining this equation, R is the distance from the center of the torus to the center of the tube part, so how big the hole in the middle is. r is how big the tube part actually is. Now, if we imagine the torus as a sequence of circles, φ controls which circle on the torus the point is on and θ controls which point on the circle. These angles both range from 0 to 360, however, since we are bound to a computer, we cannot just create an infinite amount of points to create a perfect torus. Therefore, we have to pick intervals. For example, we can range θ by increments of 30° so each circle has 360/30 = 12 points. Similarly, if we range φ by 60°, then the torus will have 360/60 = 6 circles each with 12 points for a total of 72 vertices. These parameters will control the look of the torus. The more vertices and circles the smoother it will look, but also the harder it is to render. The code to create each vertex looks something like this:
for (let i = 0; i < numCircles; i++) {
  for (let j = 0; j < pointsOnCircles; j++) {
    const tubeAngle = (i / numCircles) * FULL_CIRCLE; //θ in radians
    const circleAngle = (j / pointsOnCircles) * FULL_CIRCLE; //φ in radians
    const x = (radius + tubeSize * Math.cos(circleAngle)) * Math.cos(tubeAngle);
    const y = (radius + tubeSize * Math.cos(circleAngle)) * Math.sin(tubeAngle);
    const z = tubeSize * Math.sin(circleAngle);
    geometry.vertices.push(new THREE.Vector3(x, y, z));
  }
}
Drawing the faces
Using the method above we have obtained all the vertices, but that is not enough to draw a torus. We have to define all the faces as well, which would connect adjacent circles together to create the donut shape. In graphics, render algorithms have a hard time drawing non convex polygons, and so we must stick to drawing polygons. Additionally, since every polygon can be split into triangles, we often only draw triangles. Therefore, to render the torus, we need to draw the triangles between every circle. To make a face, we refer to the vertex by the index in the vertices array, and we specify the 3 indices used to make the triangle. Therefore, this just turns into some index manipulations to get adjacent vertices on the circle next to the current one. The code can look something like this:
for (let i = 0; i < circles; i++) {
  for (let j = 0; j < pointsOnCircles; j++) {
    const currentCircle = pointsOnCircles * i;
    const nextCircle = ((i + 1) % circles) * pointsOnCircles;
    const nextPointIndex = ((j + 1) % pointsOnCircles);

    //create a square with two triangle faces from one circle to the next

    geometry.faces.push(new THREE.Face3(j + currentCircle,
      nextCircle + j,
      nextCircle + nextPointIndex));
    geometry.faces.push(new THREE.Face3(currentCircle + nextPointIndex,
      j + currentCircle,
      nextCircle + nextPointIndex));

  }
}
Now, something incredibly important to note here is that while the order of vertices in triangles do not matter in math, in graphics they actually do. When I first attempted this, I was suprised to find that about half my triangles would actually generate like so:
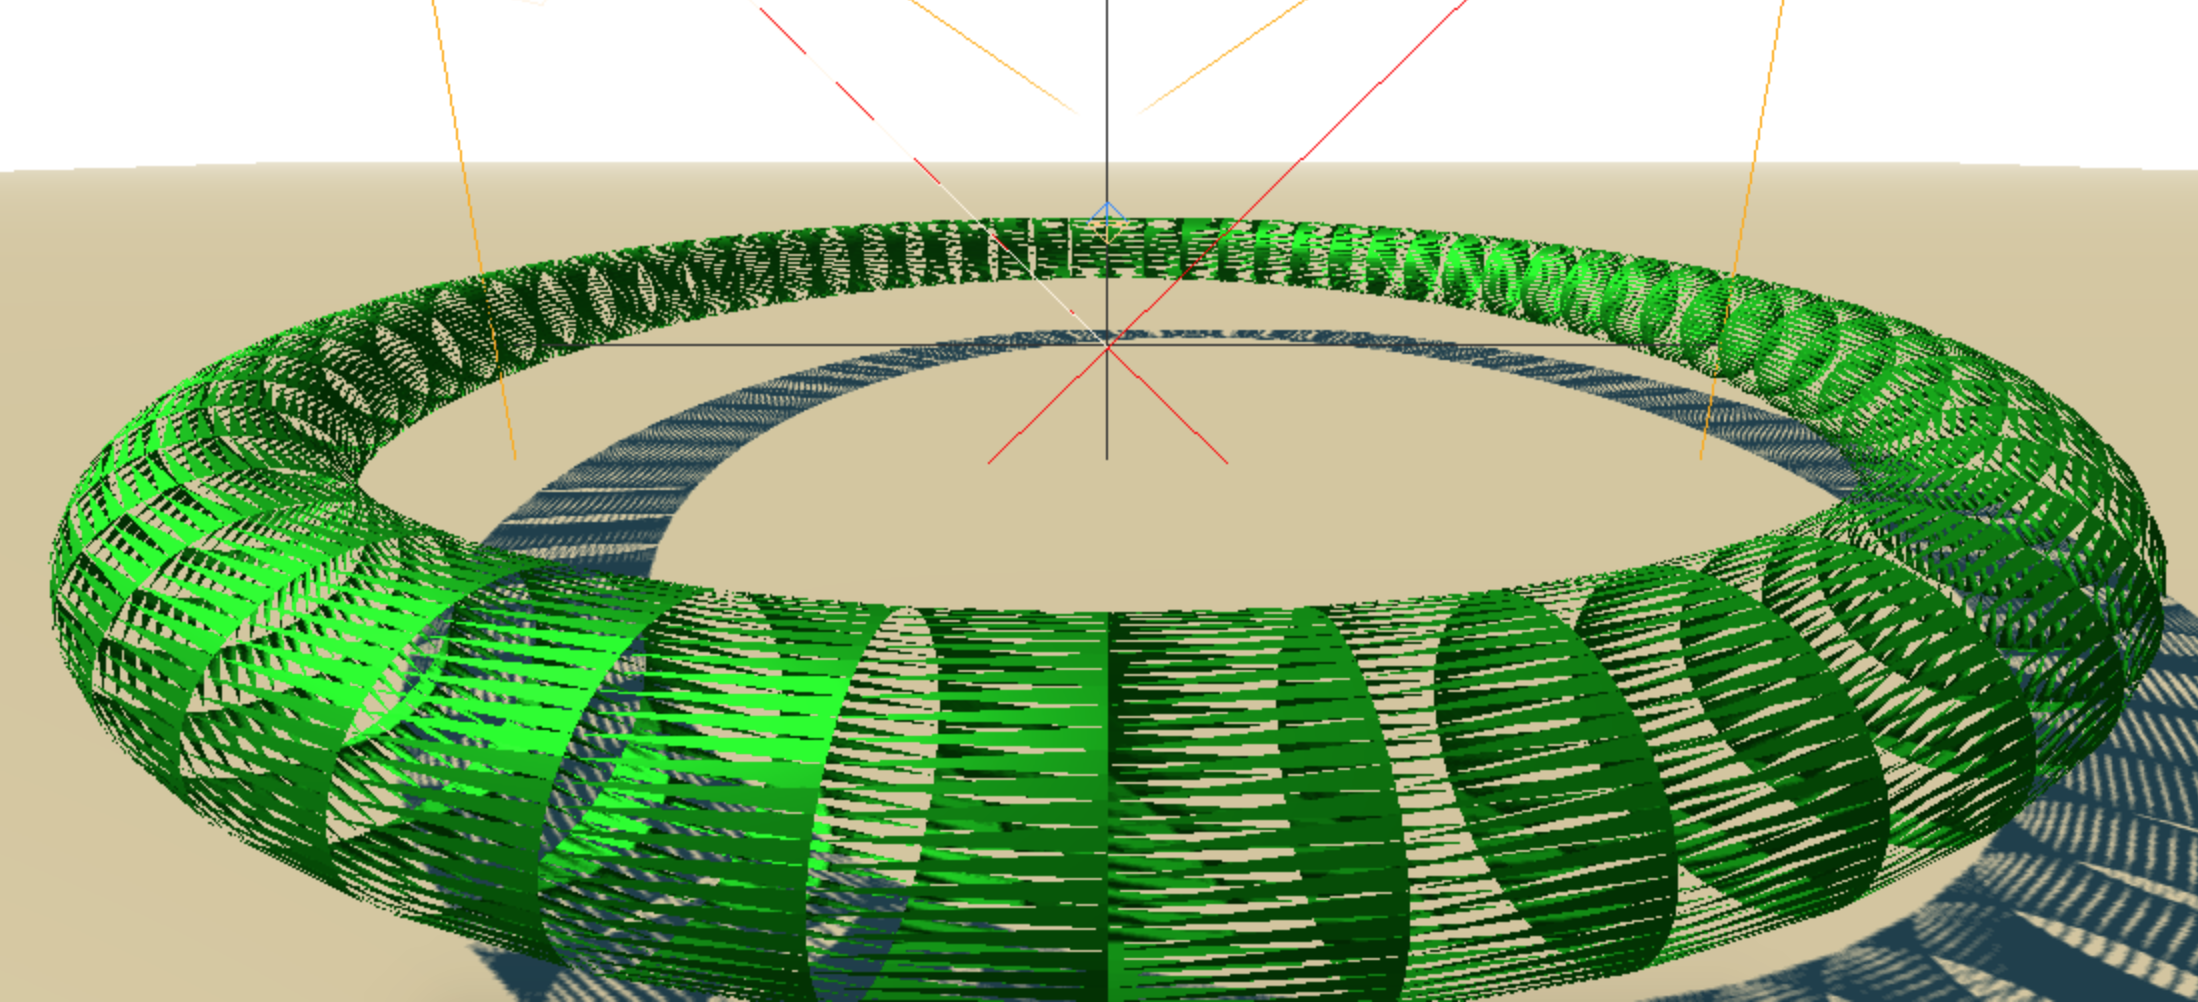
Now, this is because when we generate faces, we have to put the vertices order in counterclockwise. This is done so that when rendering, webgl/opengl can tell if a face is facing the camera, meaning the face has to be drawn, because the vertices of that face will be in counterclockwise (if you look at the face then the vertices will be in counterclockwise order). If it is back facing, meaning the face is not going to be drawn, then the vertices will be clockwise (since the face is on the opposite direction the vertices order will be clockwise). This is called face culling and is an optimization by webgl/opengl. I did not know this when I first made the torus, and I had to check three.js code to see where I was going wrong. I was suprised to find that changing the order did in fact change the rendering, but did not know why. A year and a half later now in a computer graphics course, I finally understand why that was the case!
Audio
The end result I had did not really end up as cool as the demo, so I will only briefly go over what I ended up doing. To play music, browsers give you access to AudioContext. Using this and AnalyserNode it is fairly easy to get current frequencies playing. Here is the code I had:
const audioCtx = new (window.AudioContext || window.webkitAudioContext)();
const analyser = audioCtx.createAnalyser();
analyser.fftSize = circles * 2;
let frequencyArray = new Uint8Array(analyser.frequencyBinCount)

export function playAudio(ab) {
  audioCtx.decodeAudioData(ab).then((buf) => {
    const source = audioCtx.createBufferSource();
    source.buffer = buf
    source.connect(analyser);
    analyser.connect(audioCtx.destination);
    source.start();
    animate()
  });
}
export function getFrequency() {
  const dataArray = new Uint8Array(analyser.frequencyBinCount)
  analyser.getByteFrequencyData(dataArray)
  return dataArray;
}
The demo I was going on did some sort of manipulation of the frequencies, butI did not try that and just animated the torus as I wanted to.
My final product
I did not cover the animation part of this as you would have to tie the audio and visual together, but it could be fun to try on your own (mine is honestly not that good especially compared to the demo). Here is what I ended up making https://snallapa.github.io/threejs-fun/
Knowing what I know now
I think it was good I went through that initial experience, as my lack of understanding then only helped me in my class now. I remember I was really confused on coordinates and where things were in relation to each other (how far was (1,1,1) from (0,0,0) on the screen) and these initial experiences greatly helped me now. I also remember fiddling a lot with the lighting to make it work, and now that I understand how lighting works, it is funny to see all the different mistakes I made in trying to get it right. I remember I spent a lot of time trying to debug my disappearing triangle issue and was then so confused that something as small as switching the order of my arguments could fix it. Fundamentally, it does not change the triangle so it was weird to me that it was the difference between having something drawn or not. Now, it makes more sense (but I wish there was some documentation on Three.js that would tell me about that). I went on to make a ray tracer as well, which is now my final assignment in graphics. Everything is coming full circle (torus?), and I am glad I put the effort in then to try something new.
Future project ideas
When using Three.js, there was no need for shader code. I am so glad there was not because I definitely would not have understood it if I had to write any. Now that I know how to write shaders, I wanted to make the anaglyph effect (like the red cyan 3D glasses effect). If I get it done, I will make a post on that if I find I learned a lot from doing it!